


The countertop upgrade process begins with planning and design, involving professional consultation, material choice (e.g., quartz, granite), precise measurements, and consideration of accompanying home projects. The next crucial phase is material sourcing and cutting, ensuring expert fitting. Final stages include installation, underlayment, sealing, and adding accents for a professional, aesthetically pleasing finish across kitchens, bathrooms, or other spaces.
Thinking of enhancing your kitchen or bathroom with a countertop upgrade? Understanding the timeline is crucial. This article breaks down the process from start to finish, revealing the typical duration for each stage. From planning and design to material sourcing, cutting, and installation, we’ll guide you through the entire journey. Discover practical tips and a step-by-step process to ensure your countertop upgrade is efficient and seamless, transforming your space in no time.
- Planning and Design Phase: Preparing for Installation
- Material Sourcing and Cutting Process
- Installation and Final Touches: A Step-by-Step Guide
Planning and Design Phase: Preparing for Installation

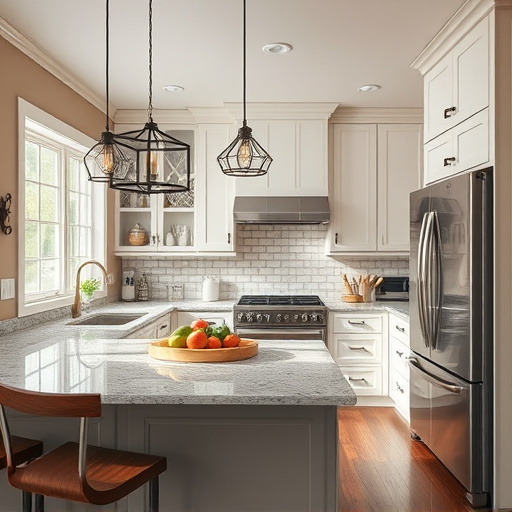
The Planning and Design Phase is a crucial step in any countertop upgrade project. It’s where you lay the groundwork for a successful transformation that aligns with your home’s aesthetics and functional needs. This initial phase involves meticulous preparation, ensuring the smooth execution of the installation process. It begins with consulting with professionals to understand the latest trends in countertops and materials suitable for your budget and design vision. This could include exploring options like quartz, granite, or laminate, each offering distinct benefits in terms of durability, maintenance, and visual appeal.
During this phase, it’s essential to consider the layout of your kitchen or bathroom, measuring spaces accurately to determine the size and shape of your new countertop. You’ll also want to factor in any necessary home additions or remodeling projects that might accompany the countertop upgrade, such as exterior painting or reshaping cabinets, to ensure a cohesive look throughout. Effective planning includes selecting the right hardware, fixtures, and finishes to complement the countertop, creating a harmonious space that enhances your living environment.
Material Sourcing and Cutting Process

The material sourcing and cutting process is a critical phase in any countertop upgrade. It involves selecting the desired material, which could range from natural stones like granite and marble to engineered quartz or solid surface options. Once the material is chosen, it needs to be carefully measured and cut to fit the specific dimensions of your countertops. This process requires skilled artisans who can accurately interpret your measurements and employ specialized tools to create a flawless fit. The sourcing and cutting stage sets the foundation for the overall success of your countertop upgrade, ensuring that each piece seamlessly integrates into your space.
In planning a countertop upgrade, whether for a bathroom remodel or other customized home renovations, it’s crucial to factor in this material preparation phase. Exterior painting or other cosmetic changes may take precedence in your mind, but the time and precision required for cutting and sourcing materials cannot be overlooked. Effective project management involves allocating adequate time for this process, as it directly impacts the timeline for completing your countertop upgrade.
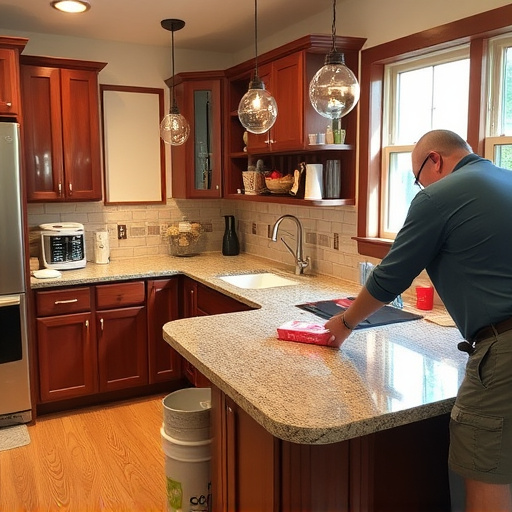
Installation and Final Touches: A Step-by-Step Guide

The final stages of a countertop upgrade involve installation and adding those final touches that make your new surface pop. Here’s a step-by-step guide to help you navigate this crucial phase:
1. Measure and Cut: With your chosen countertop material in hand, precisely measure the space where it will fit. Mark any cuts required on the material using a pencil. Then, carefully cut the countertop to size using the appropriate tools for your material—this might include a circular saw or a stone cutter for natural stones. Ensure safety precautions are taken during this process.
2. Install Underlayment: Before placing the countertop, install an underlayment to provide stability and insulation. This is especially important for materials like granite or quartz that can be heavy. The underlayment should fit snugly against the walls and be secured according to the manufacturer’s instructions.
3. Secure Countertop: Position your pre-cut countertop onto the underlayment, ensuring it fits correctly. Use screws or adhesive designed for countertops to secure it in place, following the guidelines provided by the material manufacturer.
4. Seal Gaps and Edges: Apply caulk around the edges of the countertop to create a water-tight seal and prevent leaks. This is particularly important for kitchen and bathroom countertops, where moisture can be an issue. Let the caulk dry completely before using the surface.
5. Add Final Accents: Once the countertop is securely installed and sealed, it’s time to add any final accents like hardware (faucets, drawers), backsplash tiles, or under-cabinet lighting. These finishing touches can dramatically enhance both the functionality and aesthetics of your updated space—whether it’s a kitchen, bathroom, or even an exterior bar area—as part of a multiple room remodel or a simple floor replacements project.
A successful countertop upgrade involves careful planning, skilled craftsmanship, and quality materials. From initial design considerations to final installation, the process typically spans 1-2 weeks. By efficiently navigating each phase—including material sourcing, cutting, and precise installation—you can achieve a transformed kitchen or bathroom without unnecessary delays. Remember that timely communication with professionals and meticulous preparation are key to ensuring your countertop upgrade runs smoothly and meets your expectations.